Peek Inside Our Studio!

on Thursday, January 31, 2013

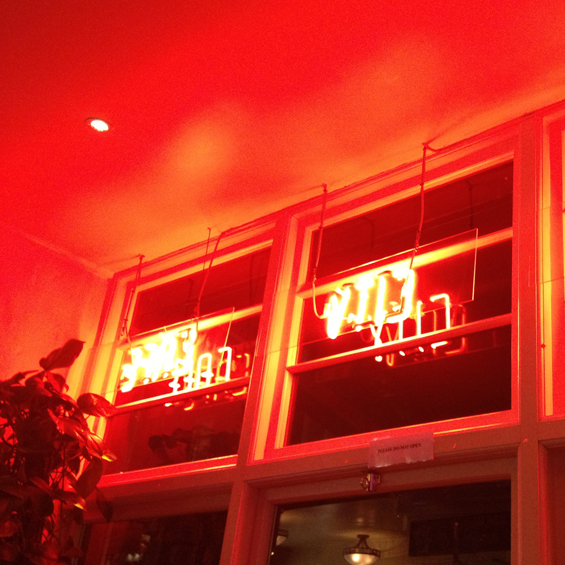
After hanging our lovely new Cable & Cotton lights and straightening up our studio, we thought perhaps you'd like to take a little peek inside Vivid HQ. As you can see, we like to keep things  colourful, fun ... and a little bit hectic!


We love to collect a lot of trinkets and treats as we find them really inspiring. Currently on my desk is our little piglet pal from Tokidoki and my favorite little Grumble Cave Monster. Who says toys are for kids? Oh! The giant bow has bubbles in it - a must have for avoiding work in style :D  Having a playful area is a great area to keep us motivated. Not all distractions are bad ones!


I took this photo of peanuts last year when I created my silver peanut pendant with Catherine Zoraida; Peanut is a nickname (I'm only wee!) I think they look amazing all lined up. Photographing your  favorite things is a great way to discover why you like them. That sounds crazy, but I swear it's not!
As for our lovely new lights, we had them custom made with those colours. I've been crushing on this combo a lot recently and couldn't resist adding them to the studio. I think I'm going to blog all about how you can do it too as they are so amazing! (read post here)


My big fluff jar full of pencils! These are two of my favorite things combined, and they work perfectly together :) I have a lot of these jars in my house as we love the font and the vintage styled branding - key things to Vivid Please! You may also notice a few sugar tins round here - another weird collection of ours - this one is particularly good as it's font is the same as our Vivid one! I love it when two things come together to make something spectacular!


Of course, here in Vivid HQ we have a lot of washi tape too... and this is only a small selection which are our current faves. I've hung them up to the left of the desk with a couple of cute paper straws and bakers twine for easy access. No studio is complete without some strange invention after all!

We hope you've enjoyed our mini studio tour and an insight into how we work... We hope it's given you a little inspiration to take into yours too :) Now, back to work!
Follow us

DIY: How To Turn Vintage Buttons Into Earrings

on Tuesday, January 29, 2013

Oooh! Vintage buttons!
I have a little pot full of such beautiful old buttons. Some from vintage clothing, some from thrifting and some from haberdasheries. I decided that I wanted to accessories with these cute sea shell ones but I didn't want to sew them on to just one item. What to do? Make them into earrings and wear them wherever I go!


This is a really cheap and easy way to update your jewelry box and make use of your old buttons. It's particularly great especially if you only have two of a kind! All you need to do is saw off the loop at the back. I did this with a small jewellery saw, but if it's plastic and you're very careful you could probably use a sharp knife. 


Once you've taken the back off, you'll need to file or sand it down. Don't worry about scoring the back of the button as this will help the glue stick..


Add a few dots of super glue or a craft glue that can stick metal and plastic together. Don't add too much as you may wreck the button if it goes onto the front. Then place your stud backings on and hold for a few seconds till the glue sets...


*Ta*Da*
Aren't they the cutest? One of a kind and only cost a few pennies. What more could a girl want? Plus, they're going to look darling next to my little cardigan clips. Perfect for rocking a mermaid look :D 
Oh! And if you only had one button, you could also use this method to turn them into brooches or rings; just switch the backing. Simply brilliant!


Happy Accessorizing!
Follow us

Pride & Prejudice is 200 Years Old Today!

on Monday, January 28, 2013

Well if that's not a reason to crack out tea and cake, I'm not sure what is!
This is the year of Pride & Prejudice; the classic Jane Austin novel, as it has reached the jolly old age of 200 years old today. It's not hard to see why it's survived the test of time and has charmed it's way into  the hearts (and shelves) of most book lovers in the UK and beyond...

As many of you will already know, I've got my eye on another man, who to me is far more attractive and worthy than the infamous Mr Darcy. However, I'm taking great delight in the fact that the two can unite on this special day to celebrate this landmark and create the ultimate girls night in...


So here is to Jane Austin and her fabulous novel... and working out that sometimes, cake is better than men! :D

Thanks Jane!

So, who's your favorite?

Follow us

Sweet Treat Of The Month

on Sunday, January 27, 2013

This year I've decided to be more adventurous in the kitchen and so far it has been a whole lot of fun! Rather than sharing everything I make, I thought I would post my favorite sweet treat of the month... a bit like a baked "pin up"!
So, this January, I'd like to nominate the ridiculously tasty Malted Chocolate Cake. It's a chocolate cake made with Horlicks, that powdered malt drink stuff and it is absolutely to die for. Being so cold and snowing outside, coming home to a slice of this bad boy with a nice cuppa has been a dream! You'll thank me for trying this one :D Enjoy!
Follow us

Book Burning Party: How To Save A Library

on Thursday, January 24, 2013


When we found out how a little library in Michigan got saved from closing down we couldn't help but be impressed. It's fascinating to see how peoples opinions will change so quickly when you rephrase the  question. 


We hope this is the beginning of a revolution to save the things that are important to all of us; all it took was a little creativity and a post online; if that's not inspiring, I'm not sure what is...


Follow us

International Post Deadline: Valentines Day

on Tuesday, January 22, 2013

Calling all international Vivid Please fans! Place your orders this week for delivery in time for Valentines Day. Orders placed after Saturday still have a chance of arriving in time, but due to bad weather here in the UK, we recommend you get in there as soon as you can :)

Snap up one of our Valentines Day gift sets here or go straight to our shop and make your favorite person's day...

PS!
Our "I Pugging Love You" card and "Wood You Be Mine" pencils have been featured in Etsy's Newsletter today! We're so excited to have two items from our shop featured, it's such an honour :D Hooray for Valentines Day!
Follow us

How To Make Freezer Paper To Create Fabric Stencils

on Monday, January 21, 2013

Hello!
Today I thought I would share a tutorial that is going to bring a tear to every British crafters eye. Unfortunately, for those of us living outside of America, we can't buy freezer paper... and therefore have to either pay a fortune to buy it online or inevitably miss out in the awesomeness that is creating fabric templates out of the stuff. How can I make you happy? Show you how to make an amazing alternative!


For those of us unsure of what 'Freezer Paper' is, it's a lot like our greaseproof paper; it's really waxy on one side (more than the greaseproof paper) and smooth on the other. It gets used for wrapping food... and putting it in the freezer. The project works as you can iron the freezer paper onto fabric as the waxy side melts and peel it off when you're done - hence it's amazing for using as a stencil.

So, how can we make it without leaving home? Easy!


For making a 'freezer paper' fabric stencil and custom t shirt, you will need:
t shirt
plastic bag
paper
iron
fabric paint
brush
sharp knife (scalpel)
cutting matt
'scrap' fabric (any fabric is fine, it shouldn't get damaged)


To make the stencil template, start by drawing or printing out your design onto a plain piece of paper. Do it the 'right way round' - we will not be flipping the design, so don't worry about letters or anything. Next, you'll need to get yourself a plastic carrier bag. Use one of the more sturdier kinds, like from H&M; don't use the really thin ones from the supermarket (or the 'bags for life' ones!) Cut it to fit the size of the paper but no larger.


Get your ironing board out and put your stenciled paper down so the back of the paper facing you. Put your plastic bag over the top and smooth it out. If the bag has anything printed on it, lay it down it so the back is facing you too. Then, put your extra piece of fabric down on the top. Iron all the pieces together for a few minutes on a hot setting. This will melt the plastic onto the paper and onto the fabric. You must make sure that all your surfaces are covered with either paper or scrap fabric whilst melting the materials together, otherwise you'll have a sticky mess everywhere!


 Once it's cooled, you'll be able to peel the fabric off and you'll be left with some waxy paper and your design!

Brilliant!


Next, cut your design out using the scalpel and cutting matt for protection. Take your time here as you want it to look great! You can cut out around the whole template too, just make sure you don't get too close to any of the edges.


Place the template on top of the t-shirt so the 'waxy' side is facing the fabric and work out where you want it to be positioned. When you're happy with it, place your scrap fabric over the top and iron for a few minutes on a hot setting. Again, the scrap fabric will protect your iron from any rogue pieces of plastic.


Let it cool and remove the scrap fabric... your stencil is now attached to your t shirt and you're ready to paint it! Using a reasonably small brush start filling in the gaps. You can paint on the top of your stencil; it wont effect your design as it can't seep through :)


Let it dry (or if you're too keen, like me hair-dry it), and iron to seal the colour. Check the bottle of your fabric paint to see if it needs another layer and repete. When you're happy and good to go, peel off the stencil...


*Ta*Da*


Doesn't it look incredible? And you used trash to make it! Brilliant!
I hope you found this little diy helpful. If you enjoyed learning how to make your own freezer paper, you may also enjoy making your own screen printing kit. With these two at home, I'm ready to take on the world!

Happy Making!
Follow us

Style Me Friday... What's In My Bag!

on Friday, January 18, 2013
rose gold sequins are for lovers

This week I thought I would give you a little peek into my date night clutch bag! 

It's not often my bag is cleared out enough to be able to do this sort of thing, but as I'm trying hard to get organised this year I thought this would be a fun way to share cute things and encourage myself!

My bag (from a-thread) is actually sold as an ipad case, but I think it would be foolish to keep it hidden away; it's just too pretty! In it lives a few of my favorite things; my vintage glasses, camera purse (from my bestie in NYC), Loud & Lovely pink lip gloss from MAC,  Juliette Has A Gun bullet perfume, Hello Kitty tic tac's (for my ridiculous sweet-tooth), and my trustworthy iPhone -it's even got our little piggy stuck on the cover! 

In hindsight of packing this bag it seems to have expressed me quite well - quite girly, a little bit quirky and a twist of rock n roll. This organisational thing isn't so bad after all!

What does your bag say about you? 
Follow us

Refinery 29 & Uncovet Desk Makeover Feature!

on Thursday, January 17, 2013
Hello! If you're a fan of the super cool Refinery29 website, you may have stumbled some of our stationery today! How exciting is that? There's a brilliant "desk makeover" feature with help from the wonderful founder of Uncovet, and we're delighted to share that our products were included in one of the shoots! 


Heather founded Uncovet to promote and sell the next upcoming must haves and has great success with it (she discovered us last year!) She got together with Refinery29 to do a  desk makeovers for the style blogger of Huffington Post, the L.A. editor of DailyCandy, the West Coast editor of Glamour and the desk of Refinery29s editor. What a task!


Heather included our products when making over Brenna Egan's desk. She's the Los Angeles Editor of Refinery29, and one super cool woman. We never dreamed that our stationery would wind up on such an important desk for all to see! What a dream!

 
Like us, Brenna is really into list making and post it notes, and much prefers to work with pencil and paper opposed to sitting in front of a screen when possible. After chatting to her about her favorite designers, what's important to her in her daily office life and discovering a little more about her, Heather set to work on getting things organised and selecting some key pieces to fit into her world

We're so happy to have been involved in such a great feature - not only because our products are included but because it's such a great read! To find out how the office makeover went down and to get some fabulous office organisation inspiration, click here


We're selling the last 5 Make & Do stationery sets on the planet with Uncovet! 
We're slightly tweaking the design of the notepad and plan to be restocking new versions soon, but if you want to get your mitts on what Heather used on Brenna's desk for shoot, you can only purchase them from here. Better get in there fast!

We'd like to say a massive thank you to the lovely people at Uncovet for giving us this excellent opportunity and helping us get our foot in the door at Refinery29 ;) 

We hope you enjoy them Brenna!
Follow us