Store Update: Lower Shipping Prices!

on Wednesday, May 15, 2013

We've been working hard at Vivid HQ to reduce the costs of shipping our goodies out to you and we're really pleased to share that we've managed to save you all a little bit more money... Hooray!

We've lowered the price of postage on most of our wonderful products (particularly for our UK friends), and we're ecstatic to share that most additional purchases will be free of additional shipping costs! 

That means more treats for less money :D 
You're welcome!
Follow us

Wordless Wednesday


Hello hello!
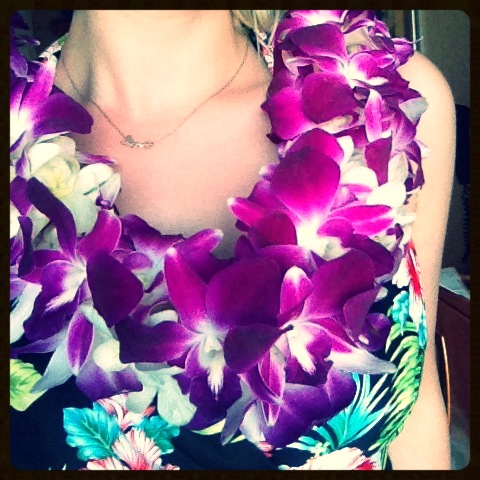
We hope you enjoyed reading our blog whilst we were away :) We're still trying to catch up on some hardcore jet lag and have yet to unpack, but it really was the trip of a lifetime! Hawaii ROCKS. I think I have about 2000 images to sort through which would make for a rather long Wordless Wednesday (!) so I thought I would give you a little peek now and share the best ones over time. 
I hope you find them inspirational - I know we do!


Follow us

Firmoo.com Glasses Review & GIVEAWAY!

on Monday, May 13, 2013

Oooh! New glasses!!
As most of you will know, we are addicted to our glasses. I have an amazing collection of new and vintage frames and don't know where I would be without my eye candy! Not only do we (desperately) need them to see, but there is no better way to accessories an outfit than finishing it off with a cute frame :)

When the new online optical store Firmoo asked us if we would be interested in reviewing their new online service and doing a giveaway after our experience, you can imagine how excited we got about the opportunity. I know quite a lot about glasses but I've never ordered prescription specs online before so I was pretty excited about this experiment .. and let me tell you now, I have been pleasantly surprised and we are SUPER pleased we get to share the opportunity with you!


I've always been a little hesitant about ordering prescription glasses online as I have been afraid that the prescription wouldn't come out right, that they wouldn't suit me or that I was secretly going to be ripped off and be handed something so shoddy I wouldn't let my niece play with it. That's why (thus far) I have always spent the extra money and purchased my glasses / updated prescription lenses with high street opticians. Taking the plunge is always a risk if you don't know the company, but now that I've done it I don't think I will be looking back! 


At first glance, the frames at Firmoo are not only modern and cute, but they are incredibly affordable and appear well made. There are plenty of trendy styles to choose from too (rare!), and as you can see, we fell in love with these geeky Ray Ban styled ones... So much so, we decided to get a set with normal prescription lenses for me as well as a pair of prescription sunglasses for David! 


In my local store, this style of frame for prescription glasses costs around £99, but these are only $26! At this point I would have turned away thinking it was too good to be true... In reality, the glasses are nice and light with our special lenses in, and are really sturdy and strong. The plastic has an amazing matt finish on them too; they're certainly not cheap in quality. It's amazing how much extra you shell out for a brand name! The only downside from buying online? You can't try them on in the flesh... But Firmoo have a programme that allows you to upload a picture of yourself and it'll show how the glasses look on you without having to get out of your pj's. That's got to be a winner, right? And it's pretty accurate if you ask me too, these glasses certainly look great on now I have them :D 


Whilst you can order all the glasses with just plain glass, we got ours with our prescription lenses added. You need to get this done at your local store and ask for the prescription once you've been 'measured up'. In the UK, prescriptions are free every 2 years on the NHS, so don't hold back! 
Once you have your form, simply enter all the numbers as highlighted on the site. It's incredibly quick and easy to do and you can always email them if you get stuck (doubtful!) If you're ordering sunglasses, the process is the same, but you also have a choice on colour and strength of the tint, which is pretty spectacular if you ask me :)

Then all you have to do is wait a week or two for your order to be delivered... Woohoo - fun post!


Ours arrived really well packaged and the glasses came with a brilliant hard case to store them in. Our sunglasses came in a hard case too, but Firmoo also included a little sunglasses bag which will be perfect for taking them to the beach. Not only that, but you also get a really good lens cloth for each order (I've had a few crap ones of these in my time, so I am overly excited about that!) and the best part of it all - a free keyring with a mini screwdriver and a couple of spare screws incase there is any problems in the future. This, for me, is the icing on the cake. I've never been given one of these before but it is going to be remarkably handy for my vintage glasses! I'm absolutely delighted with the extra effort!

So, in conclusion, if you're thinking about getting new glasses but are feeling the pinch, I sincerely recommend ordering them from Firmoo.com. They choices are great, the quality is fantastic and most importantly, they are hugely affordable!


Want to get your hands on some now? For FREE? Enter our giveaway! 

Firmoo will be giving one lucky reader a free pair of glasses (inc shipping) if we reach 50 comments on this post!

Every 50 entrants we get thereafter, we will be selecting another winner! Be sure to spread the word and tell all your friends so there's more chances to win :D

To enter:
Visit this page, scroll to the bottom and pick out the frames you would most like to win.
Comment on this blog post with the page link to the glasses you want and tell us your email address.
It's that easy!

The competition is open to everyone. Only one entry per person.
It closes at midnight on the 21st May 2013. 


a Rafflecopter giveaway


Enter using the Rafflecopter widget above.
The winner will be contacted via email within 3 days of this competition closing.


Good Luck lovelies!


Follow us

DIY: How To Make An iPad / Kindle Case


I don't know where we'd be without our iPad. We use it for our blog and shop, to research ideas and find inspiration and keep up to date with whats happening and our favourite shows and we take it absolutely everywhere! This week I thought I would share a DIY to show you how to make a cover to keep it scratch free whilst you're out and about. It's really simple and easily adaptable so you could apply these instructions to your kindle or e-reader or even your phone if you wanted!


You'll need some cute material for the outside (I've used a really sturdy fabric for extra protection but any kind will work), some felt for the lining, some bias binding tape, scissors and an itch to stitch! 


Start by cutting your material to size. When doing this, remember to add on an inch or two all the way around your ipad. As it's wide you'll need to make the case larger than the ipad so it'll fit in. Cut the felt to the same size too...


Line up the felt to the inside of your ipad cover. They should match up perfectly. We're going to add some bias tape across the opening of your case to protect the material from fraying over time. 


So whilst your felt and fabric are matched up, pin the bias tape over the front and back of the material so the two edges are hidden. You might find it easier to iron your bias tape with a fold down the middle so it holds in place whilst you're pinning it down.

Do this for both sides of your ipad case...


Lovely!


Once that tricky part is done, the felt and fabric should be securely attached. If you open it up it'll look a little like pages of a book.


The next step is to join the two parts of your iPad case together. Pin the material so both outside pieces are facing inside; we're going to be working inside out. Line up your pieces by matching up the two bias tape openings and pin the pieces together all the way around. They need to be perfectly matched up so take your time! 


Sew all away around the pocket (perhaps a centimeter from the edge) and leave the bias tape end open. When you're finished trim off any excess material and cut the corner edges on a diagonal like in the picture above.


Flip it inside out, poke out your corners and you're good to go!


*Ta*Da*
All tucked up and ready to go on adventures! Not only is this project handy for your handbag, it's perfect for protecting your gadgets when you take it on holiday :) Perfect!

Happy Making!
xox
Follow us

Jersey Boys on Broadway!

on Tuesday, May 7, 2013

Aww, and so our holiday must come to an end :( But as we're in New York, I figured it would be best for the trip to end with a bang! Our last hurrah will be spent dressed to the nines and taking in a  Broadway show :) Having spent much of our time indulging in all things kitsch, quirky and vintage, we've decided to stick with the theme... it's a great theme after all! So for one last night we're kicking it old school and indulging in a vintage style show.

Jersey Boys is all about the success story of Frankie Valli & The Four Seasons, following their rags to rock to riches tale of four 'blue collar' kids working their way from the streets of Newark to the heights of stardom...

Big Girls Don't Cry is one of my favorite songs from the 60s - you can't listen to it and not want to shimmy! So, grab you're fellas and get your dancing shoes on; here's Frankie Valli and The Four Seasons to sing us out...


We've had a lot of fun on our travels and cant wait to share our photos and inspiration when we get back! We hope you've not missed us too much... nah! 

So, Farewell USA & looking forward to seeing you soon lovelies :D

DIY: Washi Tape Gift Bag & Bow Tutorial

on Monday, May 6, 2013

Today's instalment of our washi tape diy series is going to save you a fortune in the wrapping department! This super easy tutorial shows you how to make your own gift bags (and bows!) by using mt tape and wrapping paper / brown paper, or even newspapers and magazines. Not only does it look great and match in style, it's eco friendly as you're recycling :) What a winner!


To make the gift bags you're going to need some cute paper, washi tape (mt tape) ribbon and some sharp scissors. A hole punch is also super useful, but don't worry if you don't have one, you can just cut holes with your scissors.


To start, cut out a large rectangular piece of paper. 
If you want your gift bag to be tall, make it high in length; if you want it to be wide, make it long in width. Experiment as much as you like with scraps of paper to get a feel for it.

Fold the two edges together and overlap them slightly in the middle and stick them together with a length of washi tape.


To make the flat base, fold a few inches of the paper up from the bottom and press flat.
Open the rectangular base so the sides fold in (as shown in the second image above) and press flat.
Finally, fold the top and bottom of the open fold so they meet in the middle. This will seal the base of the bag...


Easy! Add a strip of washi tape to hold it all together and you have a bag :D


Crease the sides of the bag to give it a lovely 3d shape. No one will know you've made it!


To add the handles, fold the top of the bag in on itself by a couple of inches. This will make it sturdier. 
On the outside measure and mark out where you want the bag handles to go.


Use your hole punch (or scissors) to put holes in the bag and thread through your ribbon. To secure, knot the ribbons handles on the inside and add some tape to keep them in place. 

Bag done!!


Now you're ready to embellish it with your washi tape paper bows :D

Start by sticking down a length of washi tape on a piece of scrap paper and cut it out. To make it extra cute, add some contrasting tape to the reverse side too.


Loop round the first bow end by folding one end of the tape round and behind the other.


Repete with the other side of the tape, but this time let the tail end of the bow lie over the top in the middle. This part can be a little confusing so take your time.


When you're happy with the bow shape, flatten into place. So cute!


Flip it over and tape the back of the bow so it doesn't open up when you're not looking!


Add some unbearably cute stickers and you're done!
Attach it to your gift bag with a little tape or glue and you're going to have the prettiest customised gift wrap in the world!


 *Ta*Da*

We hope you've enjoyed reading our washi tape diy series as much as we've enjoyed making them!

We'd love to hear how you like to use your washi tape. Got any project inspiration or crafty ideas? Share your tips here :D

Happy Making
xox

New York, New York

on Sunday, May 5, 2013

Farewell Hawaii!
Our days of surfing in the sun and wearing lovely lei's are all over so quickly! But fortunately we aren't on our way home quite yet... Our stop over on the way there was over in San Francisco, but on the way home we get to stop off in New York New York! I'm super excited to be heading out here too as I'll get to catch up with one of my besties who I never get the chance to see anymore.

Banter aside, we'll get to see Lady Liberty and my favourite building, The Chrysler. I'm hoping to check out the MOMA and Central Park, visit Soho and some tasty deli's ... gee there is just so much to do and such little time!

What I love the most about New York is that you don't need any real plans. In this town, they find you!  Flat shoes and a credit cards are mandatory ;)